What is Police Bot?
A tool that helps enforce CM object name conventions by checking names against a set of client-defined patterns, and emailing violations to appropriate agency teams on a daily basis. PoliceBot is a self-service tool that helps enforce CM360 object name conventions by checking names against a set of client-defined patterns, and emailing violations to relevant people, such as agency traffickers on a daily or weekly basis.
How much time does it take to run?
The recipe should take probably around 10 mins, assuming you have your naming conventions and validations handy (that is the most time consuming portion). The basic steps are:
- Copying and setting up the Google Sheet and script, like enabling the CM360 API.
- Inputting naming conventions and validations.
- Testing the solution to make sure it’s working as intended, then scheduling the triggers to run daily (or weekly).
How does PoliceBot work?
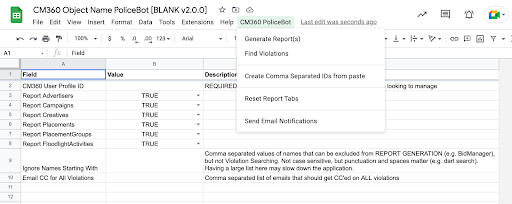
PoliceBot is intended to be run on a daily trigger, but for ad-hoc and testing purposes, a menu item is included. The tool works in 3 sequential steps:
- Generate Report(s) – this pulls a simple report of object IDs and their names, such as Advertisers, Creatives, Placements, etc. from CM360, into a dedicated tab for each.
- Find Violations – this will add a violation column to each report tab, and then parse the names, cross checking Pattern Rules and Pattern Validation to find names that do not conform to the convention you specified.
- Send Email Notifications – Emails a sampling of violations for each CM360 object to relevant teams.
Keep in mind that PoliceBot does NOT “fix” any names by changing them (writing to CM360). It only notifies you of a violation, much like a police officer can write you a ticket for speeding but can’t actually stop you from speeding all the time.
What are Violations?
PoliceBot considers a name to be in violation if it:
- Does not conform to the expected length of components in the naming convention. A convention of Brand_Agency is length 2, and Brand_Agency_Channel is 3, and so on.
- Does not conform to the allowed options in the Validation tab.
Description of Sheet Tabs

- Instructions: Concise set of instructions to the end user (typically a client), but does not go into tool setup like this doc does.
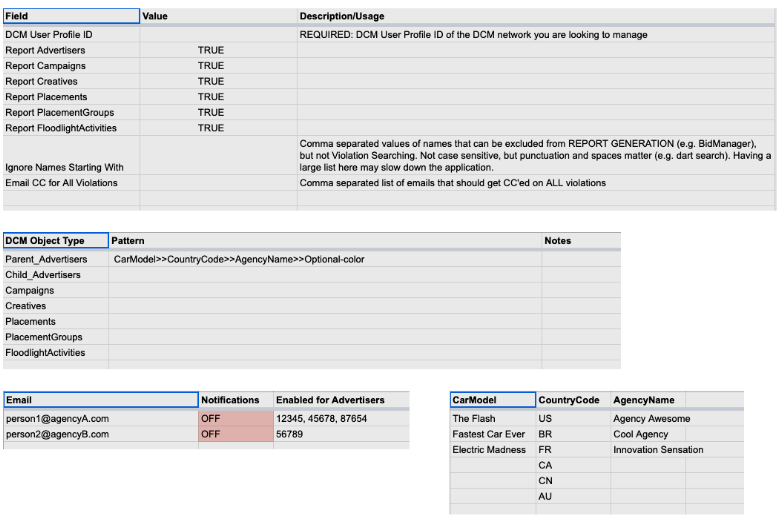
- Configuration: Contains most of the tool setup, including your user profile ID, and which CM360 objects to enable.
- Email Notifications: Define emails and the advertiser IDs they each manage – Please note that this is subject to GDPR compliance.
- Pattern Rules: Define your naming conventions here
- Pattern Validation: Define the allowed values in naming convention components here. Case sensitive.
- Whitelist: Define objects that should be ignored and not checked for violations. You can whitelist an entire advertiser and campaigns, creatives, placements associated with it (using Inherit From Advertiser column), or an individual object.
PoliceBot Setup
Run the PoliceBot Ingredient in Yuniter
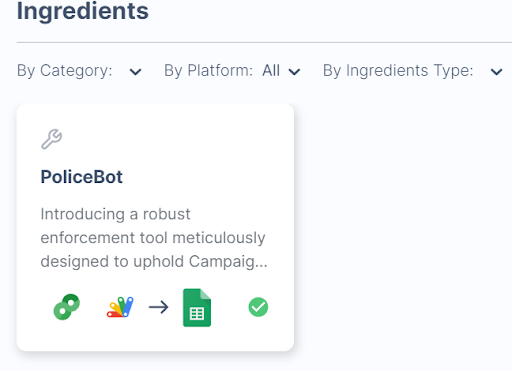
- Create a recipe in Yuniter with the “PoliceBot” ingredient.
- Add a recipe name
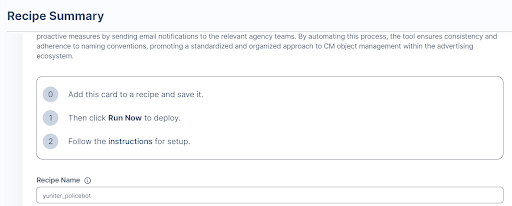
- When you run the recipe, a new spreadsheet will be created for you, with the title “PoliceBot For {{Recipe Name}}”
Configuring the Sheet
Configuration Tab
- You will need your CM360 User Profile ID. Enter the CM360 User Profile ID where prompted.
- The next set of rows reading Report <CM360_object> allow you to set whether or not you want to check against that object type. Disable the object types you don’t need by setting it to FALSE.
- Ignore Names Starting With: this tells PoliceBot to ignore names that start with anything that you put here. For example, “TEST – DO NOT USE”, or “BidManager”, comma separated.
- Email CC for All Violations: typically the agency or advertiser admin’s email goes here. S/he will be cc’ed on all violations that go out, so when certain people/teams aren’t making progress to address violations, they can follow up.
Email Notifications Tab
Add emails (can be comma separated), enable ON or OFF, and the list of Advertiser IDs (comma separated) for each. If you have a long list of IDs you’re copying from Google Sheet/excel, there is a feature to help you add commas under Menu > PoliceBot > Create comma separated IDs from paste.

Pattern Rules & Pattern Validation
The Pattern Rules tab is where you define your naming conventions, and the Pattern Validation tab is where you define the possible options for each component of the naming convention.
Currently, only naming conventions separated by underscores are supported.
On Pattern Rules, don’t touch the CM360 Object Type column, you’ll be entering the conventions for each into the Pattern column. Let’s say for example you are a well known car company, and have a naming convention for Parent Advertisers, which should contain the car model, country code, and agency name, in that order. The naming convention might look like:

The associated validation for this would be input into the Pattern Validation tab. For each component of the convention, make a column that EXACTLY matches its portion of the pattern rule you defined. To continue the example above, your Validation tab would look like this. Keep in mind that the Column Names (e.g. CarModel) cannot contain spaces or special characters.
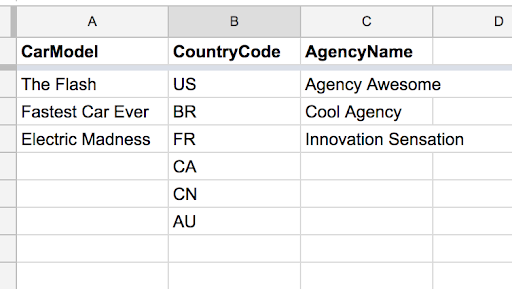
Again, make sure the columns match exactly. Everything is case sensitive, including the content, so CM360 names that don’t match casing will be considered a violation.
There are additional features when you define the Pattern Rules that you can use:
- Setting a component in a naming convention as option using Optional- (including the hyphen). For example:
A convention of Brand_Agency_Optional-CountryCode means the name can be length of 2 or 3. Optional fields are not checked against validation.
- “Or” logic using the | character (pipe). This allows you to specify multiple columns that should be checked against a name component in a convention. For example:
A convention of Brand_Agency_CountryCode|CountryName allows either a country code of “US” and “United States” to be valid in the name. No space before/after the pipe character.
Whitelist
This tab lets you define CM360 objects that should be exempt from violations. Consider the below example:

- Advertiser 1234 will its name and objects underneath it, such as campaigns, creatives, placements be exempt.
- Advertiser 4567 will have only its own name be ignored, but not its campaigns, creatives, placements.
- Same as above with campaign ID 123 and creative ID 456.
How to Run Policebot?
Once the setup is complete, you’re ready to start policing! As mentioned, you can run this ad-hoc using the menu bar, or set up triggers, which are reviewed below.
Ad-Hoc
- Generate the reports by Menu > DCM Name PoliceBot > Generate Report(s). Once you authorize the app, you will see new tabs being created for each CM360 object type you enabled from the Configuration tab.
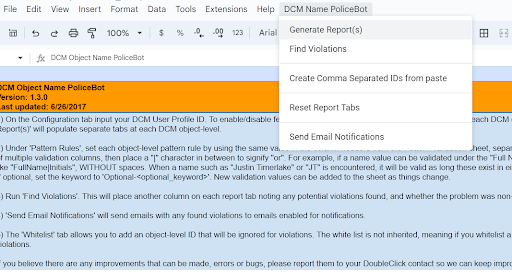
- Once this is complete, Menu > DCM Name PoliceBot > Find Violations. You’ll see each report tab getting a new violations column, and then violations fill up, if there are any.
- When running ad-hoc this is optional, but good to test. Menu > DCM Name PoliceBot > Email Violations will send enabled emails with any violations that are relevant to those advertisers. *NOTE* that currently, when there are zero violations, you will still get an email showing so.
Schedule Triggers
Triggers allow the tool to be scheduled regularly, which is ideal since you want to catch naming violations sooner than later, so that live data doesn’t populate with the old names.
Open the Script Editor, and navigate to the left navigation menu > Triggers:
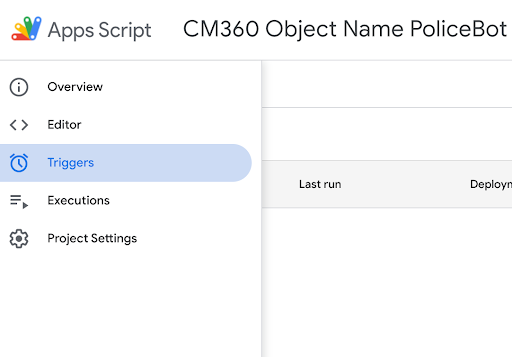
You should not see any triggers if you haven’t already set any.
You are going to set 3 daily triggers, one hour after another. The 3 triggers need to map to the menu bar functionality and are named:
- generateReport
- findViolations
- emailViolations
You can follow the the below image to set this up to the recommended configuration:

You will want to also configure each with an error notification in case something goes wrong. Do this for each of the 3 triggers:
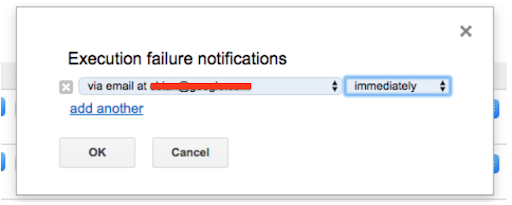
This is now configured to run automatically every day. If you have tested the entire flow using the ad-hoc method above and confirmed the tool is working as intended, you should not see any errors. If you do (they are rare but can happen), kindly forward them to your Yuniter rep for troubleshooting assistance.
